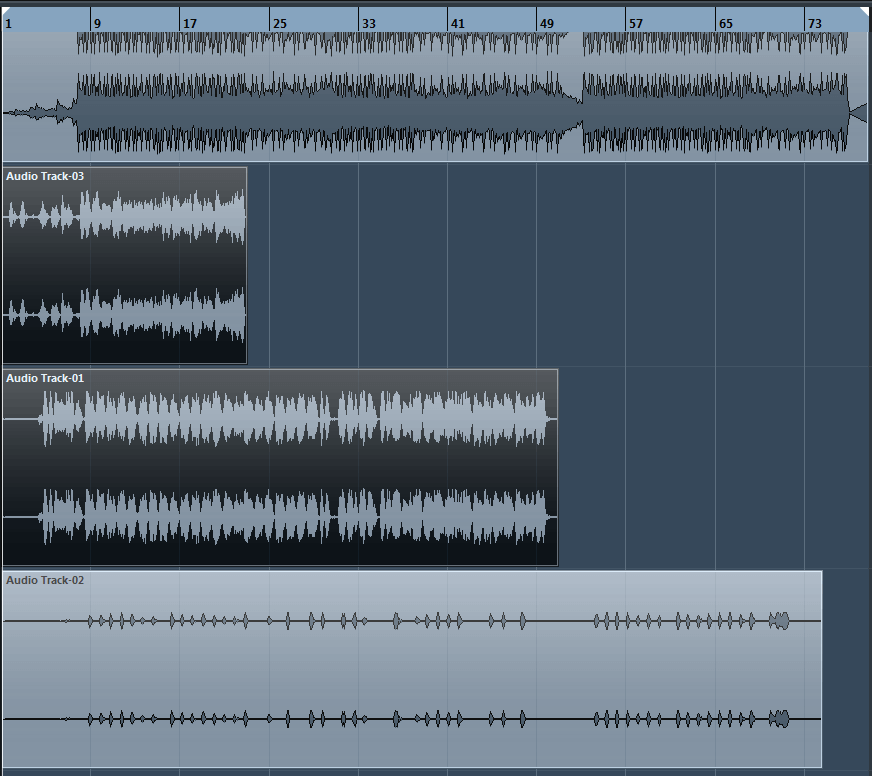
I recently received a song for mixing from a client that records in Audacity. I always ask for the song tracked out, meaning for each track in the song to be individually separated, which is pretty much standard practice when mixing. The problem was when I went to load up his song in my DAW, this is what it looked like.

You see the two highlighted tracks in the middle? Those are the two main vocal tracks and they’re overlapping each other. The problem I quickly realized is that Audacity doesn’t print the negative space in between tracks and therefore when you go to bounce multiple tracks to import into another DAW, you’re left with extra work of manually aligning the tracks. Extra work? Who wants to do that? I didn’t see any hands go up.
So how did I fix this?
Being a part-time Google ninja, I was able to come across two links that seemed worthy of solving my problem here and here.
1) “Ctrl+A” (select all)
2) “Home” key (move cursor to start)
3) “Generate menu > Silence” and generate, say 1 second of silence at the start of all tracks.
Or
Audacity does not respect white space in front of tracks when exporting. If you want to export tracks correctly offset from zero, select each track (not all together) and apply Project > Quick Mix (Tracks > Mix and Render in Audacity Beta) to each track so that the white space is rendered as silence.
These two approaches may work for you, particularly if you know Audacity. Since my first experience with Audacity, was literally downloading the program and loading my client’s Audacity session I didn’t want to have to learn Audacity, frankly because it’s the ugliest music program I’ve ever seen and because it’s insanely slow and buggy.
So what I did to solve my problem was delete the tracks I didn’t need (why did I delete and not solo? Because Audacity for some reason won’t export the tracks correctly if you try the old solo each track and export method). In my case, I was able to overcome this limitation by deleting the first track which was the beat track and the last track which was an ad lib track and do a simple song export. This allowed me to have the main vocals perfectly timed and rendered in one track.
I was lucky because the recording of the vocals started from the beginning of the song and could be used as a guide so to speak. If you are not so lucky, what you can do is create another track and just record dead air from the beginning of the song until the song is over and export it and you’ll have your vocal track. Voila!
I know this is not the best solution but it worked and I also encouraged my client to step his DAW game up. If you’re using Audacity and want to know which are some good DAWs. Here are a few I recommend you look into: Cubase, Logic, Fl Studio, and Pro Tools.


