Okay guys today we’re talking about exporting individual tracks in Adobe Audition.
And here’s just a little fun fact about Adobe Audition, it was previously called Cool Edit Pro and was created by another company called Syntrillium way back in 2003. I only mention that because many of us, myself included, began recording as teens using that program so it is near and dear to heart.
Anyway, let’s get to what you came here for: To be clear, what I’m going to show you how to do is export the individual tracks within a recording session so that you can send it for mixing and mastering so that it can be loaded into different DAWs in wav or aiff format.
Step 1
First thing you’re going to do (after you’ve obviously opened your session) is go to File > Export > Multitrack Mixdown > Entire Session
Step 2
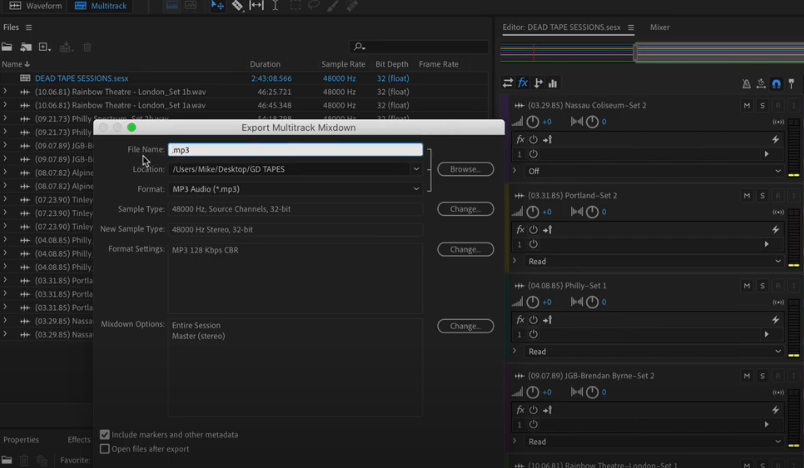
Next you’ll notice a pop up window comes up asking you what you’re going to call your files as well as what format you want them exported in. So where it says, “File Name” you can put in anything and it’ll go before the track name (I would just put in the name of the song).
For “location” click on browse and create a folder and title it the name of your song. I would call it something like “Name of Song (stems)”.
Step 3
This part is kind of important so I gave it, it’s own step. This is where you choose the format of the audio by clicking on what else, “Format”. Now depending on the mixing and mastering service you’ve gone with, they may want it in different formats. For us, we’ll take it in either wav format or aiff format, so if you’re sending it to us, just select the last option Wav PCM (.wav).
As for sample type, we ask that it’s in whatever resolution you recorded it in. This would usually be in
- 16 bit 44100 HZ or 48000 HZ
- 24 bit 44100 HZ or 48000 HZ
- 32 bit 44100 HZ or 48000 HZ
Don’t do anything crazy like make it less than this say 8 bit or go overboard and make it 96000 HZ.
Step 4
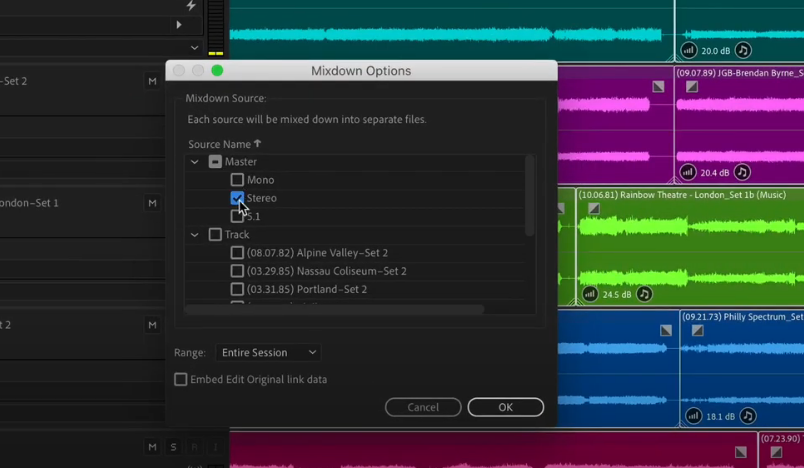
Okay this step is really important but don’t get nervous or anything: You’re just going to go to Mixdown Options and click on “Change…”
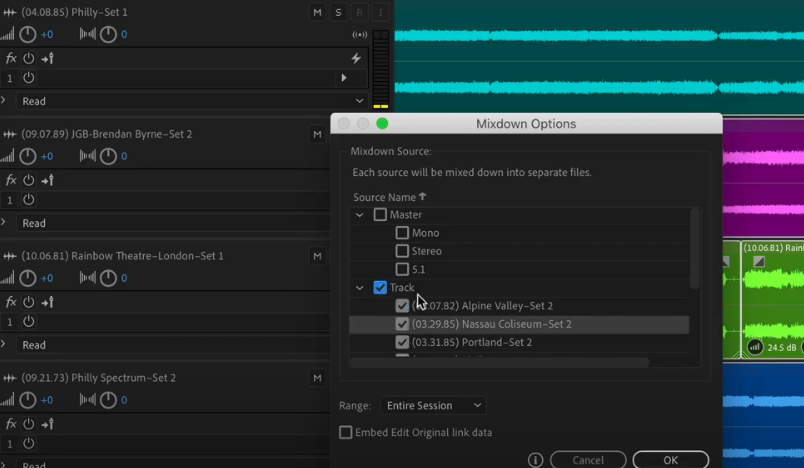
Now uncheck all the master track option, if you dont’ want a mix down of all your tracks into one track. But if you do, say your audio engineer wants a reference mix, you can leave this checked.

Next you’ll check the Tracks box and it’ll select all the tracks in your session to export as it’s own individual track and then you’ll click “OK”.
Step 5
Then you’ll click “OK” again and Adobe Audition will start exporting the tracks. Woohoo!


Mind blown, I wish I knew about this feature years ago, thanks so much!
Thank you so much for sharing this insight…
Bruh. So happy to have found this. I’ve been exporting 32-channel WAVs from Audition and opening them in Audacity to export individual tracks. This will save me an hour a week, which ain’t nothing. Thank you so much. Nothing on the Adobe forums for how to do this.
Glad to help bro!